Create a Realistic Can Mockup in Photoshop
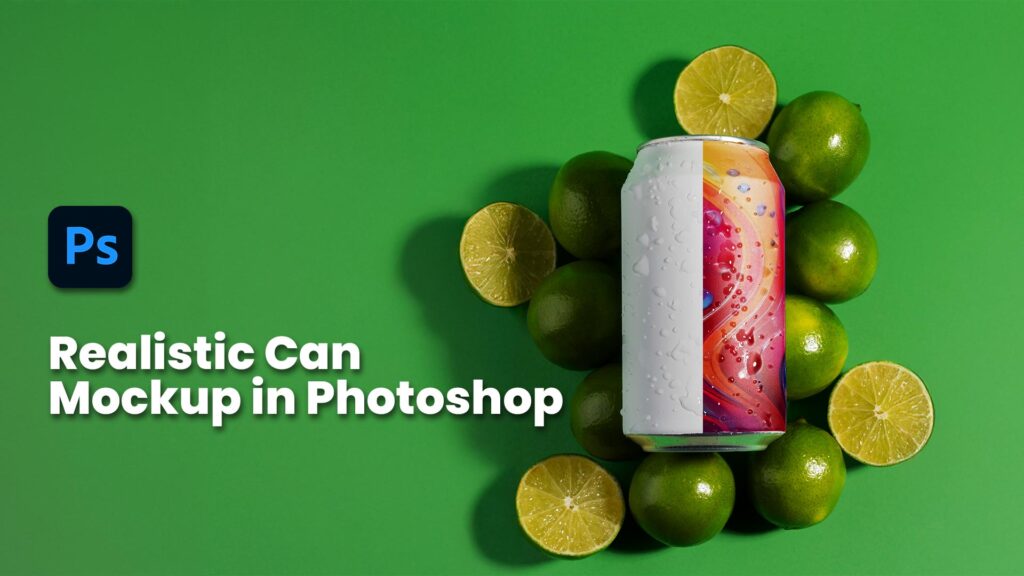
Want to learn how to create a professional can mockup in Photoshop? This beginner-friendly tutorial will walk you through the entire process step-by-step. You’ll master essential Photoshop tools like the Object Selection Tool, Quick Select Tool, and Transform mode, and learn advanced techniques like Smart Objects, Distort, and Warp settings. Follow along and design your own can mockup with ease! Whether you’re an aspiring designer or looking to elevate your Photoshop skills, this guide has you covered.
How to Remove Color Casts in Photoshop

Removing color cast from a photo is a piece of cake with this one-minute technique. Sometimes the surrounding lights of objects in a photo create an unnatural effect of an overall wash of color in your photos. This mostly happens for example when you are taking photos in fluorescent lighting. Or the nearby objects reflect lights that totally create a color shift in your photo.
In this video, we follow a few easy steps to remove the color cast from a photo. We bring back the natural color to the photo and make sure that each part of the image is looking as close to its original color.
These few easy steps help you learn more about colorize in Neural filter and how to use layer mask and brush to improve the color of a photo and remove its color cast.
I believe if you like photography or you are just an Instagram user or have some images that need some color cast removal you will love this technique that helps you remove color cast in almost a minute.
Removing Harsh Shadows from images

Removing Harsh Shadows from images is just easy with this one-minute technique. Sometimes shooting in harsh sunlight or in dark environment can actually create dramatic results. An example is the unwanted harsh shadow on the images you want to have a nice contrast of shadows and brightness on.
In this video in a few easy steps we want to remove unwanted shadows from an image and give it some brightness of course to the parts that the sun must be shining more.
These few easy steps help you learn more about the channel of colors in an image and how to use reverse selection to invert selected areas. You will also learn more about hidden mask and blending modes including even some handy tips for you who are very new to Photoshop.
I believe if you like photography or just an Instagram user or have some images that need some shadow adjustment you will just love this shadow adjustment technique that helps you remove the harsh shadows in almost a minute.
Golden Skin In Adobe Photoshop
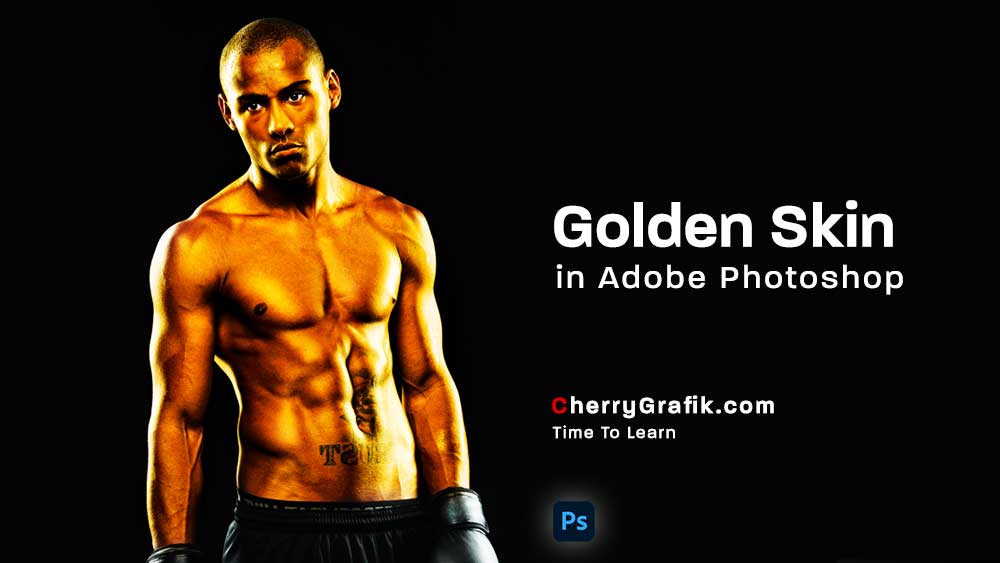
Gold skin in the Photoshop made type of skin that creates a wonderful heat on the image!
In this video in a few easy steps we wan to change a natural skin to golden and we can see how by tweaking some sliders you will get the perfect golden tone with shadows and highlights and glitter of gold over the skin.
I believe different tastes would like different gold tones so it is up to you to make it your own type by using the sliders. Follow along the video if you are interested in making gold skin and make sure you will practice and master your skills in creating the perfect gold as per your taste.
Wrap Text In Photoshop
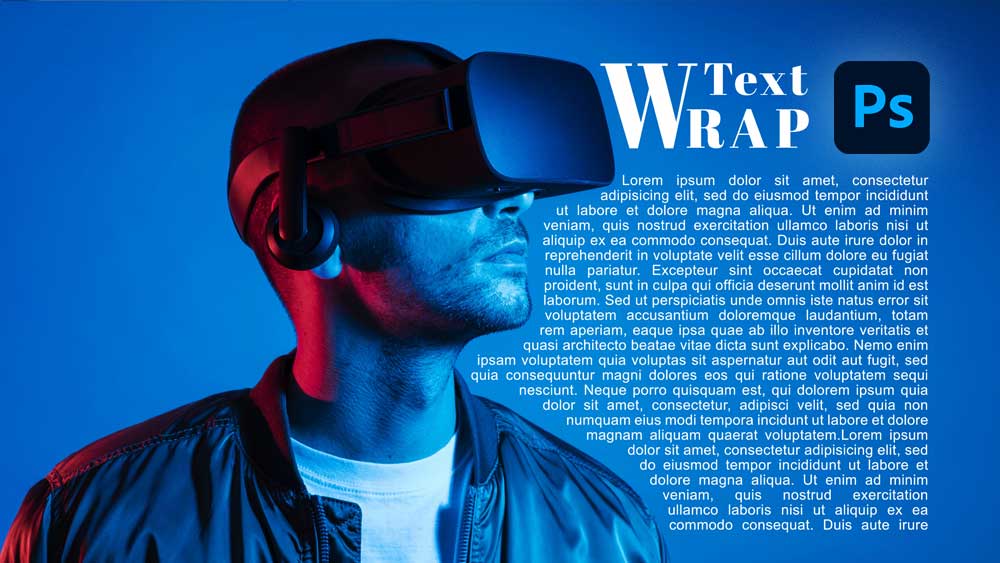
Wrapping text somewhere close to the subject of your design is one of those handy techniques that I call them must learn in design world.
The normal text box we get from the tools in Adobe Photoshop has its own bounding margins which is straight lines but what if we want to put the texts around things with no straight lines.
Then we should wrap them, right? In this video we learn how to wrap text around a subject in Photoshop. We will use rulers and guidelines to define margins and the pen tool is our super star in this technique.
If you never even thought about this still I recommend you to watch this you will get so inspired about how you can make designs more beautiful and optimized when there are texts around your subjects.
Match Colors in Adobe Photoshop
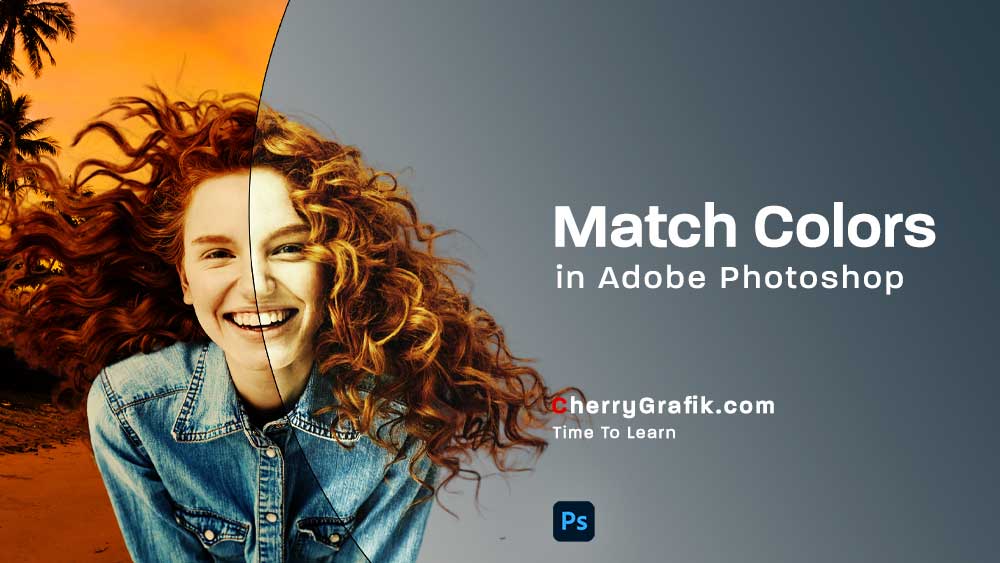
Matching colors of entities used in an image is very crucial in designing jobs.
Sometimes you want to mix different pictures and the lights, brightness, colors, contrast, etc. are not matching. This is when Adobe Photoshop comes to help again with the match color option.
Using this technique, you can simply match the colors of different layers or entities of an image. For example, you can make the sun yellowish color shine from an image taken in the summer to an image taken in a cloudy winter day.
It is easy and very quick to match the colors, so don’t miss out learning it in this video.
Duotone Effect in Adobe Photoshop

Duotone effect is now becoming a trendy effect again!
Although there is no need to reduce the color variation in an image for printing anymore!
Still Duotone effect is attracting more attentions since it is simply beautiful.
To me, Duotone is an enhanced version of grayscale with two-distinct color effect which creates an illusion of a subtle richness and modernity in the image!
Ok, but how to create Duotone effect? Well, the simple answer is to watch this video and follow along and you can make it in a minute.
In this video, we use a very easy technique in Adobe Photoshop and within a few clicks, we create a Duotone effect. The steps are also provided so if you want to remember the steps after watching the video, have a look into the step-by-step guide.
Change Age In Adobe Photoshop
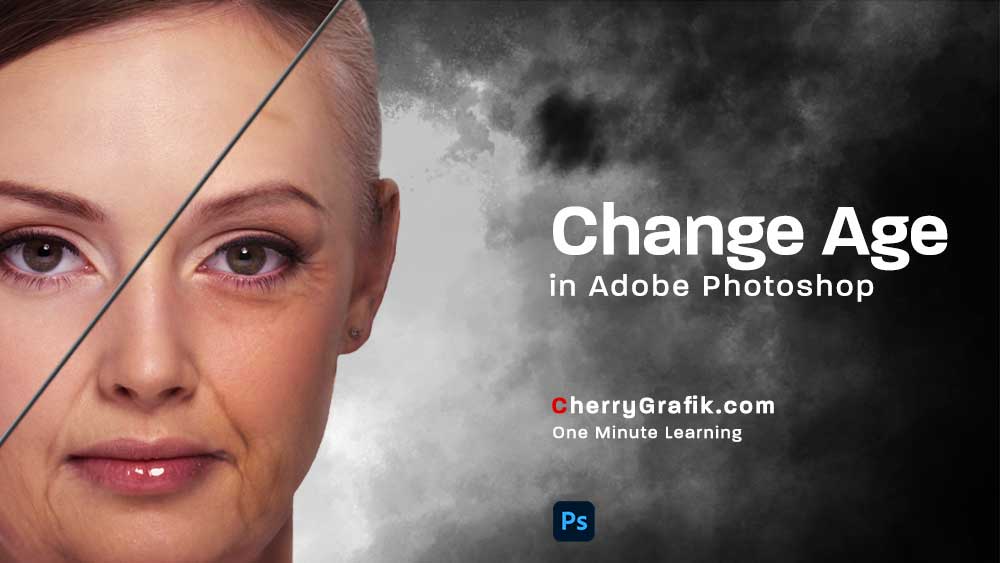
Changing age in an image like making the face older or younger is one of the features recently added in Adobe Photoshop. Right now we are in the year 2021 that I’m writing this ???? The smart assistants help you apply different filters to your images, like Facial age that simply gives the image natural wrinkles and lines to make it older or remove the lines and smooth the face to make it younger. Oh, it really does more than that…. Let’s see how it simply performs this very tough job in just a glance. Watch the video and try it you will see how it makes life easier!
Autumn Color Effect in Photoshop
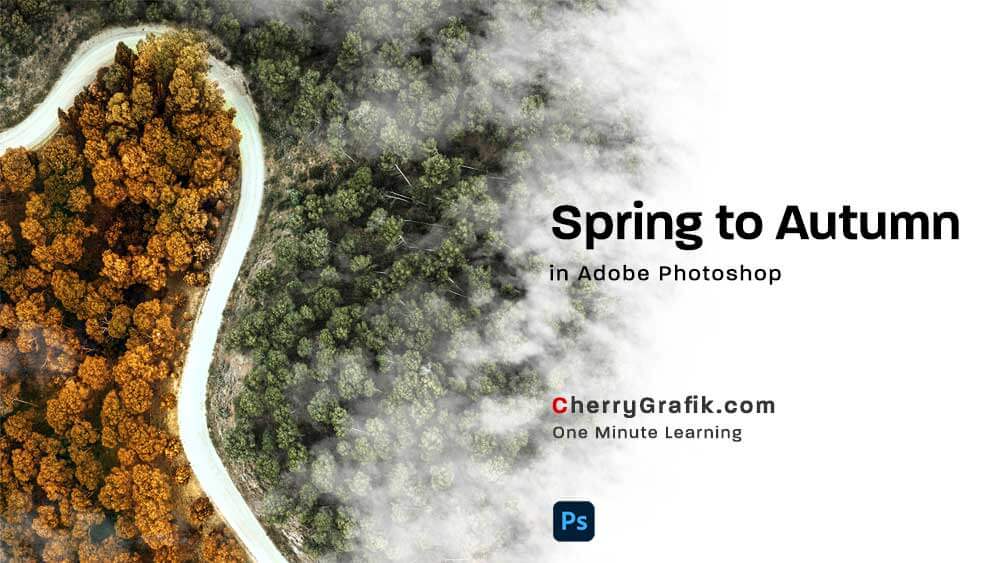
Turn the Spring into Autumn! Is that possible? I sure say yes.
To me, Autumn is the king of seasons with its beautiful colors, lights and absolutely their effects on the images we take in this amazing season. But should we always wait for the Autumn to go photography! Not really always. We can do it in Adobe Photoshop too. You wonder how! Follow along this video and learn some easy steps to adjust your color image and make it an Autumn pic!
Underwater Text Effect in Adobe Photoshop
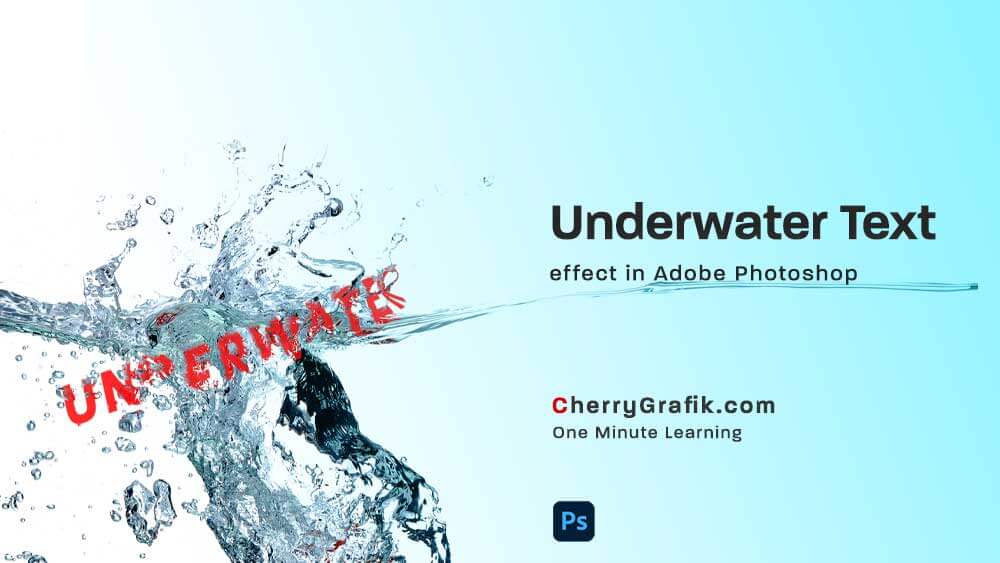
Putting text under water in Photoshop gives you the ability to dive into the water in your imaginations.
Take your text with you from the paper and drag them down to the underwater world.
In this video we learn a technique to put texts under water in Photoshop.
This is done applying different effects our creative friend, Photoshop provide us with ????
Get a water image and you are just some clicks away to make it, watch the video to expand your text underwater skills.